I would also think that if you just pinched it with some wire cutters and drove it back it would probably stay.Originally Posted by Crazy Dane

Probably more evidence that most guns never get shot.

GP100
PCC Comp 19
Mods here are shit


I would also think that if you just pinched it with some wire cutters and drove it back it would probably stay.
Probably more evidence that most guns never get shot.

The old timers who were certified gun cranks did tend to go with the oversize pin option. Most any gunsmith could turn one out that worked fine, and the jobs I was most impressed by were the ones with slightly domed pin ends that had been "set" on both ends with a punch just enough to upset the pins an almost invisible amount. The pins were usually just a wee bit proud of whatever they were in, IIRC.
"Splining" the end of a pin is sort of a variation on the flattening technique, but takes a bit more care to look nice.
Bending the pin was the quick and dirty way, and not necessarily the worst way depending on the situation. I was taught to make the bend gradual, not all in the center but as much of the length of the pin as practicable... YMMV.
While I was skeptical of them in the past, the medium-strength retaining compounds like Loctite 641 work pretty well when used thoughtfully. The higher-strength similar Locktite products are overkill and may make removal a real nightmare- I have seen a closely fitted barrel band that had the high-stength stuff applied in lieu of hard soldering have to be "surgically" removed from the barrel.
gn
"On the internet, nobody knows if you are a dog... or even a cat."

This is where I screwed up. I put the pin across a hole in my armorer's block and hit it with a big punch making a not so gradual bend. I wish I had the skills to spline, that seems to be a more "professional" way.
Mr. Devoid worked on a 3 GP and a fixed sight Match Champion for me. Those two will not be traded or sold off while I am breathing.
Last edited by Willard; 02-29-2024 at 07:35 PM.

Removing the rear sight pin and inducing a slight bend is the easiest solution, it's worked well with my Security Six. On my GP100, I had Chris Peters address it in conjunction with his rework and customization; according to his notes, he both peened and locktited it. Sucker hasn't budged an iota in 26 years of use. Best, Jon
Sponsored by Check-Mate Industries and BH Spring Solutions
Certified Glock Armorer
I would imagine that hitting each side of the pin with a centering punch, with the opposite side supported, of course, would do the job.
"It's surprising how often you start wondering just how featureless a desert some people's inner landscapes must be."
-Maple Syrup Actual

Thanks for that, Im going to add it to the Skeeter thread I started a while back!
Heres the article: Skeeter's Dream Gun
Nothing so needs reforming as other people's habits - Mark Twain
Tact is the knack of making a point without making an enemy / Where is the wisdom we have lost in knowledge?
Thats the S&W fixed rear, right? Did you settle on a single load or does it work for multiple loads in the same weight/velocity range?
Was the Apex hammer a functional upgrade or just to have a spurless hammer?
Nothing so needs reforming as other people's habits - Mark Twain
Tact is the knack of making a point without making an enemy / Where is the wisdom we have lost in knowledge?
I think the S&W sight originated as the Cylinder & Slide sight.
FIFY...
My plan is to at some point settle on what I think is going to be my favorite general use 357 load and figure others will be close enough. Once I settle onto a load I will get a Dawson FO front (lots of sizes available), but other shiny objects have distracted me. You would think I have enough reloading machines I could do more than one thing at a time, but...
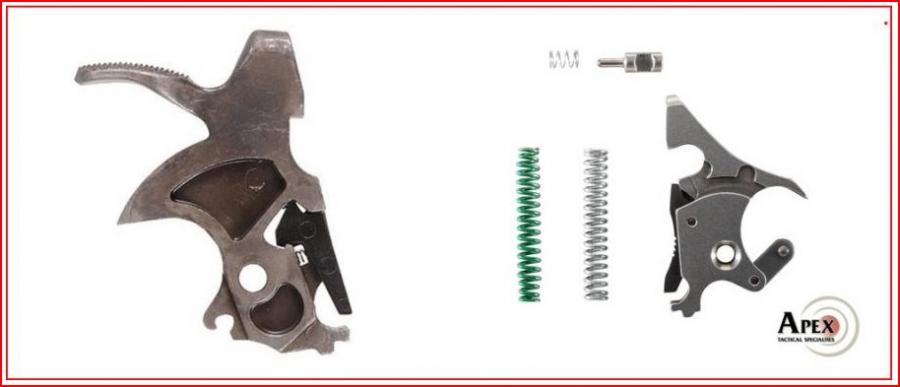
I wanted the spurless hammer, and I am a bit of an Apex fanboi so I gave it a try. It is a lot of money, but it is nice, and came with the spring kit also. I believe since it is not a skeletonized MIM part it makes up for the loss of mass by being heavier, and has enough mojo with a pretty light spring. It does have a nice trigger for just a drop-in kit.
This shows what I was referring to, there are cavities in the factory MIM part. It was a splurge, but I think it was only $150 when I bought it. But I am in a mode of having less stuff, so more willing to indulge in the stuff I do have.

 Reply With Quote
