Results 1 to 10 of 10

Thread: Kel Tec Sub 2000: Initial thoughts for a winter project rifle.

  1. #1
    Member
    Join Date
    Nov 2017
    Location
    Currently by the ocean in CA and on the move to a more free state. Three more years!

    Kel Tec Sub 2000: Initial thoughts for a winter project rifle.

    Some time ago I wrote about getting and M&P10. When I went to pick it up from the dealer, a friend, he asked if I would consider cancelling the sale so he could sell it to one of his high dollar customers who was going on a TX pig hunt and wanted a semi-auto .308. I of course let him have it and in return he gave me the run of his store and promised a bargain on whatever caught my eye. I was about ready to save the favor for later when he pulled out a Sub 2000 set up for Glock 19 magazines and with a state compliance fin grip. He was having a hard time selling it and offered it to me at an extraordinarily low price. I have never owned a Kel-Tec firearm and only have heard bad things about them. I handled a Gen 1 Sub 2000 many years ago and was not at all impressed. I initially passed on it, but he told me that he has sold a ton of the Sub 2000's and they worked pretty good. I went home and Googled the Sub 2000. Most reviews were positive and some people were even raving about them. I did like the compact size of the rifle and how it could be stowed in a very small package. So I grabbed the Sub 2000 the next day.

    Bringing it home and inspecting it closer, the Gen 2 is a much better gun than the Gen 1. The plastic on the fore end and receiver is thicker and more robust than the Gen 1 I handled years ago. The fore end has M-lock slots and picatinny rails on the top and the bottom. The sight seemed functional but required a very low cheek weld to acquire a good sight picture. The bolt was ridiculously hard to retract at first, but has lightened up with some lubrication and shooting. The trigger is perhaps the worst trigger I have ever felt. It is long, spongy, and feels like the plastic trigger is going to break before the gun actually fires. The safety is a simple cross bolt and works well enough. The 19 grip is very short and my hand falls off the bottom. The rifle feels much better with the larger capacity Glock magazines or the GL21's.

    My plan for this rifle was to make it a dedicated truck gun if it actually worked. If it didn't I would send it down the road and make a profit. Before I invested a lot of time and ammo into the gun I wanted to see if it would run.

    Today I headed up to my range in the desert to give it a go. I added a red dot in a QD mount to help with accuracy and to evaluate the potential out to 100 yards versus my standard Gen 5 Glock 17. I brought 200 rounds of mixed ammo as well as Glock and Magpul magazines.

    I did clean the barrel before I shot it, but that was about it. Right out the box, the sights on the rifle were dead on at 25 yards. I did not really shoot for accuracy today, but even with the horrid trigger it was able to get some fist sized groups as fast as I could manipulate the trigger. The gun went through the first fifty rounds without a hitch. The recoil is not harsh, but you do feel the metal stock extension hitting your cheekbone everytime you fire the rifle.

    Next I mounted the red dot and got it dialed in. I set up a 10" gong at 50 yards and easily hit it. The rifle was becoming more interesting. The trigger remained horrible though. I went through another 100 rounds shooting from a target at 25 yards to the gong at 50. It was very easy to make hits. The rifle still had zero jams and was beginning to smooth out. It was faster and more accurate than my 17.

    For the last 50 rounds I moved the gong out to 100 yards. I was able to hit the gong about 75-80% of the time. The rifle shot the last 50 rounds with no issues.

    At this point I think the rifle is worth further exploration. I found a company that sells metal upgrades for most of the internal components. The total cost for these parts is about 220 dollars. Since the rifle functioned so well stock, I think this will make a good winter project gun. I am not sure that I would invest this much into the rifle if I had bought it at a retail price though.

    My next steps are to install the metal parts, a sling, and work on a better sighting system. I am hopeful the new trigger and trigger bar will improve the feel over the plastic trigger. If this happens, I am sure my accuracy will also improve. My astigmatism was horrible today and I had a mini galaxy on the glass. I might look at a 1x prism sight or maybe an upgrade to the iron sights. I think my red dot days are over. The rifle is very compact when folded and would fit in very tight places. In a small box you can fit the rifle, three magazines and a red dot. If this project pans out, this would make a great travel companion.

    I will order the parts next week and update the thread as the project progresses. So far the rifle shows promise and I am hopeful the upgrades will give me the confidence I need to actually put the rifle to use in my vehicle. As it comes stock, I would consider this a range toy or a very limited use rifle. We will see if the upgrades make it into a usable tool.

    All threads are worthless without pictures so here are a few from today.

    Here a couple from the 100 yard gong:

    Name:  IMG-0653.jpg
Views: 848
Size:  64.9 KB

    Name:  IMG-0654.jpg
Views: 856
Size:  40.0 KB

    Inside the case:

    Name:  IMG-0669.jpg
Views: 852
Size:  60.1 KB

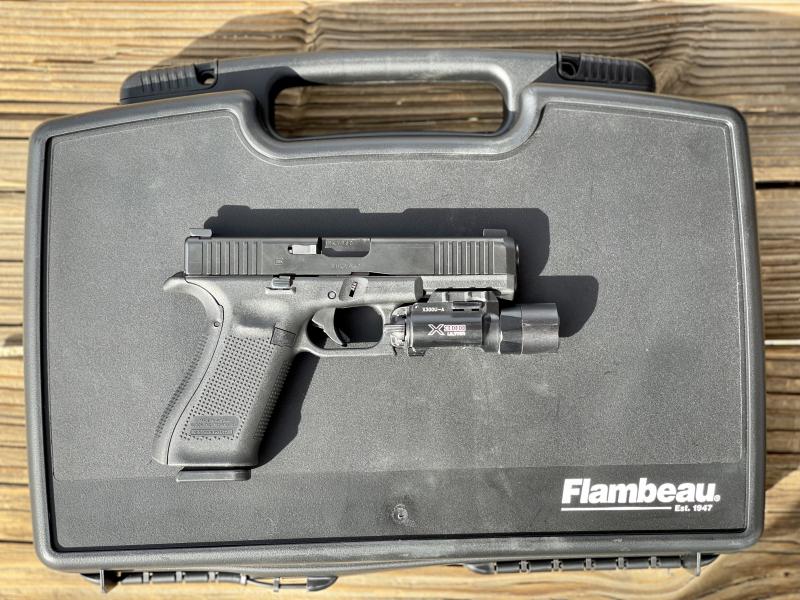
    My Glock 17 on top of the case for perspective:

    Name:  IMG-0675.jpg
Views: 868
Size:  90.7 KB

  2. #2
    Site Supporter
    Join Date
    Jul 2017
    Location
    Texas
    You have a really neat little rifle. I have used the company customer service dept which was always helpful. I urge you to call them about the trigger. I bet they will work on it for free. Also some of these rifles have been recalled because of defective barrels. Your rifle performs flawlessly. If you start installing aftermarket parts, it may not do as well.

  3. #3
    The Nostomaniac 03RN's Avatar
    Join Date
    Aug 2017
    Location
    New Hampshire
    They are fun plinkers. My wife splurged for on of the blue ones back when we were working at a gun store.

  4. #4
    Is there a way to mount a 45-degree optic and still fold it all (or most of) the way?

  5. #5
    Quote Originally Posted by fly out View Post
    Is there a way to mount a 45-degree optic and still fold it all (or most of) the way?
    https://www.midwestindustriesinc.com...i-g2sub-t2.htm

  6. #6
    Member
    Join Date
    Nov 2017
    Location
    Currently by the ocean in CA and on the move to a more free state. Three more years!
    Clams on the half shell....

    Well the upgraded parts arrived and I finally had some time to put them in the rifle. I wanted to inspect the parts before I posted the company's name so if there were any problems I could give them a change to straighten it before commentators launched into a tirade. This caution was all for not as the parts arrived on time, where exceptionally well made and fit without a need for additional fitting.

    I ordered an internal upgrade kit from M-Carbo that included new springs, an aluminum trigger, an aluminum trigger guard, a precision cut trigger bar, a metal feed ramp, a metal hammer bushing, extended magazine release and (surprisingly important) hardened steel screws and grip pin posts posts for the clam shell design. All of the components of the kit were neatly packaged and easy to organize for installation.

    Before I started, I watched the M-Carbo videos a few times to be sure I had a good understanding of the rifle. I read in the reviews that working on the gun can be a nightmare and that parts go flying. I can tell you that I had none of these problems but did make sure I had plenty of time if needed, a clean workspace to find flying parts, and the video playing on my tablet during the assembly process. From start to finish it took about an hour, but the large blocks of time were dedicated to addressing some design flaws that are corrected by some of the new parts.

    The first area that was a bit of a pain was the removal of the C-clips on the safety. There is not a lot of room to work and even with the supplied M-Carbo tool it was a pain. I finally realized that finesse was not going to cut it, applied a good amount of pressure and off they came. The next area was more frustrating and is something that everyone who attempts this should be prepared for. It is addressing the stripped aluminum grip pins. This is a problem brought up in the M-Carbo video and one I encountered on two of my grip pins. Several of the pins lie within the clam-shell design and thus the screws must be removed from both ends to fully disassemble the grip frame. I needed to insert a slightly oversized allen key in the grip pin, apply a slight amount of lateral pressure, and was able to remove the stripped screws. I did not want to damage the grip frame, so i took it really slow and eventually got the screws out.

    Once the gun was appart, it was just a matter of following the video, reinstalling the new/upgraded parts and it was back together in no time. It was honestly an easy task and not complicated at all. I will say that the steel grip pins from M-Carbo are a huge improvement and made reassembly a breeze. The parts come al la carte or in a package deal. Disassembly and reassembly is the same for a single part or the whole kit, so I would recommend doing it all at once even if that means waiting to save up for the kit if money is tight. All of the trigger/sear/hammer parts do work in concert so at a minimum those should go in as a set.

    During my first outing with the stock rifle, the trigger struck me as the biggest draw back. It seemed cheap, likely to break, and generally horrible in all the remaining categories. I can say that this kit reduced the trigger pull by at least 1/2 if not 2/3 rds. It is really astonishing. the trigger is still spongy, but is also smooth, much, much lighter, and has a more positive reset. The metal feed ramp and metal hammer bushing are also a huge improvement over the plastic replacements. Overall this kit is well worth the price of the contents.

    My son commented that the M-Carbo parts transformed the rifle from a Ghetto Blaster to a Get-Home Blaster.

    I did not take a whole lot of pictures because the process is well documented online, but here a few to keep the thread from being worthless.

    The insides:

    Name:  IMG-0754.jpg
Views: 880
Size:  99.6 KB

    Name:  IMG-0757.jpg
Views: 676
Size:  100.9 KB

    And the finished product:

    Name:  IMG-0758.jpg
Views: 681
Size:  99.2 KB

    Name:  IMG-0759.jpg
Views: 684
Size:  75.0 KB

    Now I need to find some time shoot to it and refine the contents of my carrying case. I will post an update after I shoot it.

    I hope this is helpful for potential Sub 2000 owners.
    Last edited by ECVMatt; 11-13-2021 at 06:26 PM.

  7. #7
    Member
    Join Date
    Nov 2017
    Location
    Currently by the ocean in CA and on the move to a more free state. Three more years!
    I got a little trigger time on the Sub 2K and it is definitely growing on me. I was going bird hunting this weekend and stopped along the way to do some plinking. I wanted to shoot the Sub 2K after the parts installation and I am happy to say that everything worked great. I put 200 rounds through it with no problems. That brings the round count up to around 400 rounds with no problems. The gun functions great and it much smoother both with the trigger and in general operation with the MCarbo parts.

    Initially I was a bit whiny about spending the extra dollars to make the Sub 2K a better shooter until my son reminded me how much I have spent modifying Glocks and AR's. After shooting the it yesterday, it was money well spent. I am working on a light, detachable sling and still debating iron sights vs. red dot. I am going to work on a final zero and then will report out on accuracy. It also makes an attractive ban-state option as the fin is attached with only four screws so it is easy to add or remove as needed. Here are some glamour shots just because.

    Name:  IMG-0872.jpg
Views: 568
Size:  93.4 KB

    Name:  IMG-0869.jpg
Views: 586
Size:  48.3 KB

    Name:  IMG-0877.jpg
Views: 589
Size:  100.9 KB

  8. #8
    Member
    Join Date
    Nov 2017
    Location
    Currently by the ocean in CA and on the move to a more free state. Three more years!
    Well I am sure you guys are sick of this by now, but I am pretty much done with the project so here is the final update.

    The factory rear sight was 100% dead on from the box. It was functional but had a small aperture and forces the shooter to really raise the stock off the shoulder or cram you head into the extension to get a good sight picture. I tried enlarging the hole by simply drilling it out. This worked well for me, but the sight was still uncomfortable to use. MCarbo had a replacement, but it did not seem like there was enough room in the folding design to make a big difference. After trying the factory sight again, I decided to give the MCarbo replacement a try. The bottom line is that it works. I am bigger, 6'2" and it works for me. My son is 6'5" and it works for him. There is enough adjustment in the front sight to accommodate the increase in height. I feel this is a mandatory upgrade for someone who does not want to use a red dot and would like to shoot the rifle comfortably. The sight will also offer a lower 1/3 co-witness with an ADM QD mount if that is important.

    I finally figured out the sling as well. I started with a simple USA made nylon sling. I did not cut it and used tri-glides to take up the slack. This leaves lots of room to adjust the sling over heavy clothing if needed. I used an M-loc QD cup up front and a ITW 3DSR buckle in the back. I found this buckle while looking for attachment methods on the Mil-Spec Monkey site. Obviously these buckle folks are much smarter than me because I can't figure out how it locks/unlocks and stays locked but it does. It is very easy to release by putting it in the palm of your hand and squeezing, yet is rated to 300 pounds. It looks a bit funky to have two different attachment methods on the sling, but it does what I need it to do within the parameters of the stock design.

    The last item I will comment on is the red dot. There are few different ways to attach the red dot. MCarbo has a slide-flip up mount that looks great but also increased the width of the gun dramatically. Midwest Industries has a twist mount that looks good, but you need to tie the bolt back during storage for it to work. I went with the standard QD mount. With the better sights I can use the rifle as soon as it is deployed if needed. If I have time, I can detach the red dot from the bottom rail and install it on the top. I did this numerous times with no shift in zero so I am confident that it will work when needed. I did learn one important thing while practicing with the rifle however. When trying to move the red dot quickly, it is very easy to install the red dot backwards. I did this on accident and thought the red dot was beginning to fail. I could see a huge star-burst of light in the center of the scope and rounds were going all over the place. When I realized what I did, I flipped it around and was back on target. There is no real remedy for this other than practice. I did draw and arrow on both sides to help me visualize the correct orientation. This worked good and in practice I have not put it on backwards again.

    So some final thoughts. There are probably some straight from the box solutions that would be better for a compact Get Home Carbine. I got a great deal on the rifle, so that offset some of the cost of the upgrades. Thinking in context of my Glocks, 10/22's and AR's, the upgraded parts were not exorbitantly pricey, but they are a must for me on this rifle. Installing the parts myself helped me to learn the basic function of the gun and how to better operate it. The extremely small size of the package when folded makes it ideal for the car, plane, hotel room, etc. When deployed it is very simple to hit an 8" target out to 50 yards, much easier than with a handgun. Shots out to a 100 yards are pretty easy to make as well. I have over 400 rounds thus far without a single malfunction. I will spend the next couple of months practicing a refining the use of this carbine, but it looks like it is good to go for my needs. Hopefully this thread has been useful to potential Sub 2K buyers.

    Here are some pics for reference.

    Name:  IMG_1039.jpg
Views: 593
Size:  60.1 KB

    Name:  IMG_1035.jpg
Views: 476
Size:  25.9 KB

    Name:  IMG_1031.jpg
Views: 472
Size:  87.9 KB

    Attachment 81281
    Last edited by ECVMatt; 12-12-2021 at 04:59 PM.

  9. #9
    Updates?

  10. #10
    Member
    Join Date
    Nov 2017
    Location
    Currently by the ocean in CA and on the move to a more free state. Three more years!
    Well, I still really like the gun and it has moved into the house to supplant my Glock 19 bedside gun.

    My eldest son has some medical issues and we have a lot of folks in and out of our home right now. I did not feel comfortable with my long gun set up so I moved them to the safe and pulled out the S2K. I have it secured safely in a very small backpack, hanging in my closet with some other sports gear. Last month, the police chased a bad guy into the neighborhood (a very rare occurrence) who promptly ditched his car and tried to hide. In short order I was able to retrieve the gun, flip it open, move the sight and load it up. The bad guy actually made it pretty far before he was caught, but it was a good exercise and reassuring to have a "rifle" option so quickly available.

    In terms or a new round count I am up to about 800 rounds and it continues to be flawless. It runs equally well with Magpul GL mags as it does with factory Glock magazines. It is hard to describe shooting it other than to say it is a bit more rough experience than some of my other guns. Having said that the M-Carbo parts make a world of difference and continue to improve with each outing. The police activity reminded me that it is time to put some more rounds through the gun and I am hopeful to get that done in the next couple of weeks.

    I am also considering putting a Primary Arms SLX 1X on the rifle. The red dot works, but I am definitely getting the over 50 starburst. My family still prefers the Ruger PC Carbine. It has been great as well. The Ruger has a better trigger, is more accurate, and feels better to shoot. Even with all those pluses, I will keep the S2K as the house gun. It was almost comical how easy it is to deploy and make ready.

    I will post another update after the range session, but I still find this a very handy, accurate, and reliable rifle.

User Tag List

Posting Permissions

  • You may not post new threads
  • You may not post replies
  • You may not post attachments
  • You may not edit your posts
  •