-
Leopard Printer

Week 375: SOTM Control Drill
Week 375: SOTM Control Drill
Results may be posted until July 5th, 2020.
Designed by: Gabe White
Range: 12-7 yards
Target: Shooters choice of two silhouettes and two smaller targets, see below.
Start Position: Holstered
Rounds Fired: 35 or more
This is a short drill to work on shooting control during movement and barrier use, while engaging multiple targets of varying difficulty. It is a practice drill that addresses a composite of subskills, rather than being a discrete test of each subskill. Sharpening integration of the subskills is the goal.
Range configuration:
Set up two silhouettes and two smaller targets at the zero yard line as shown in the diagram. Just about any silhouette target could be used. The smaller target should be significantly more difficult than the body A-zone of the two silhouettes. Small target examples: small reactive target, hanging tennis ball, B8 bull, CNS zone of an additional silhouette, or similar. Set up a short barrier (suitable for kneeling or squatting, but not standing) at the seven yard line. See diagram below:
[img] SOTM Control Drill Diagram by OrigamiAK, on Flickr[/img]
Drill procedure:
First, establish a baseline par time by shooting the drill until you shoot it clean - complete it successfully with the minimum number of shots (four As in the silhouettes, and a single shot/hit on the smaller target - five shots total.) This should be done by shooting in a comfortable manner. Start with the handgun loaded and holstered, standing at the twelve yard line. At the start signal, draw and begin advancing toward the short barrier at the seven yard line, shooting BOTH silhouettes on the move with two shots each. Once the silhouettes have been engaged, shoot ONE of the smaller targets. Continue engaging the smaller target until it is successfully hit once. When the short barrier is reached, assume a suitable position there (lower than standing in order to conform to the barrier.) Depending on the shooter and/or the repetition, all the targets may or may not have been engaged when the short barrier is reached. Simply perform each task as the opportunity arrives: If you are not at the barrier, keep moving toward it while shooting accurately. When you reach the barrier, get in position and use it. Once all targets are successfully engaged, stop shooting. However that adds up exactly, is fine.
After establishing the baseline par time, repeat the drill until you have done a total of six more repetitions (three where you engage the left small target and three where you engage the right small target.) That will require thirty rounds, plus any extra shots fired at the small targets. The twin priorities are to continue shooting as clean as possible, and meet or beat the baseline par. For drill purposes, a run is deemed successful if there are four As in the silhouettes, the smaller target is successfully hit once (however many shots that takes), and the total time is less than the baseline par time.
On each run, do the same thing, but alternate small targets (run one engage silhouettes and left small target, run two engage silhouettes and right small target, etc.)
Feel free to modify distances or other aspects of the drill if it allows a shooter to participate or make the drill comport with mandatory range procedures.
Please report the following when you post your results in this thread:
Equipment used (pistol, holster, optional concealment garment if one was used)
Targets used
Any modifications to the drill
Par time established with clean baseline run
Number of successful reps after the baseline (six possible)
Best time on any successful rep
Anything you noticed
Training with firearms is an inherently dangerous activity. Be sure to follow all safety protocols when using firearms or practicing these drills. These drills are provided for information purposes only. Use at your own risk.
-
Member

G19gen4, BladeTech Total Eclipse strong side OWB
Concealed, T shirt
Using my modified IDPAs, and a small shoot n' see
Range mods: only used one small target, due to the width of the spot I was at
Baseline par: 10.38
Successful reps: 3
Best: 7.98
Setup:
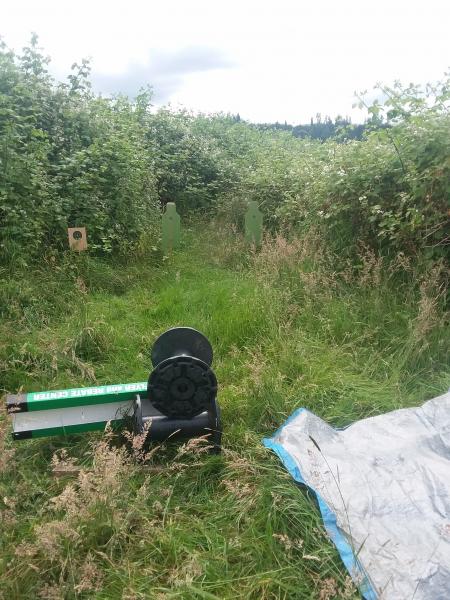
at 7 yard line, barrier:

Base: 10.38, 5 shots
1-12.74, took 7 shots
2-7.98, 5 shots
3-11.10, 7 shots
4-10.31, 6 shots
5-14.36, 6 shots
6-9.68, 6 shots
The damage:
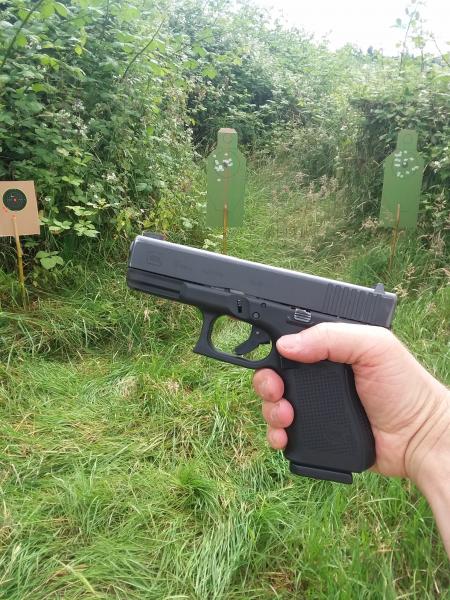
Hardest part, honestly, was just makin' a good hit, from kneeling, on the small target. Zoom in you'll see I missed it a few times!
Also, assessment is an issue...looking to make sure you in fact DO have 2 good hits in the A/-0 zone, before engaging the small, takes a bit, instead of just rapidly engaging both then going for the small.
I hope I'm doing this one right, because I think it's great that it takes assessment into account, makes you look, makes you think.
I could shave off a little time if that -0 zone was steel, or a 8" shoot n' see.
Last edited by ViniVidivici; 06-20-2020 at 10:21 PM.
 Posting Permissions
- You may not post new threads
- You may not post replies
- You may not post attachments
- You may not edit your posts
-
Forum Rules


 Reply With Quote