-
Leopard Printer

Week 109: Driving The Gun/Lateral Transitions 1
Week 109: Driving The Gun/Lateral Transitions 1
Results may be posted until May 24th, 2015.
Designed by: Gabe White
Target: Shooter's choice (need at least two)
Range: Shooter's choice
Rounds: 0
This is one of several drills intended to work on shot calling, sight tracking, and trigger manipulation in dry fire. In this drill we're going to be working one method of practicing lateral target transitions. This method will emphasize trigger control at the cost of continuity of grip and vision. Those elements will be emphasized in an upcoming drill.
At bare minimum, verify gun is unloaded, have no live ammo anywhere in the dry practice area, and keep muzzle in a safe direction. But there is more you can do to ensure safety in dry practice. Please also read Robust Dry Practice Safety Principles and Procedure following the drill description.
Drill procedure: Start aimed at one target. Press the trigger and dry fire the gun. Now, continuing to hold the trigger to the rear, use your support hand to cycle the slide enough that the striker is reset or hammer is recocked. Resume your two-handed grip. All that was preparation for what we are actually drilling, which is the next part: snap your eyes to the next target spot, and simultaneously let the trigger forward allowing it to reset as you drive the front sight to that target spot. When you see sufficient alignment in the sight picture, press the trigger well enough for the target. Repeat many times.
That's how it is going to work with striker fired, single action, and DA/SA guns (this drill addresses shots after the first one, so even a DA/SA gun is essentially going to function as SAO for purposes of the drill.) With a true DAO, you can skip the part where you break grip and cycle the slide to get the mechanism ready to reset.
You will be interrupting your grip a lot, so make sure you reacquire your real grip on the gun each time. Focus on resetting the trigger while driving the front sight into sufficient alignment with the next target and pressing the trigger carefully enough as soon as you would hit.
Target considerations: You can use whatever targets you want. You will need at least two. I'd suggest using a variety of targets, from easy ones where you can pull the trigger well enough, as fast as you can pull it and before the gun is completely stopped, to harder ones where you have to be more careful with the trigger and stop the gun too. Also vary the spacing of the targets. Closely spaced targets only need you to push the gun over gently. Widely spaced targets allow you to generate acceleration for the transition using your legs while keeping the upper body shooting structure intact.
Do the drill for a period of time you choose, rather than for a specific number of repetitions.
Please report when you've completed the drill, what gun you used, how much time you spent on the drill, and anything you noticed.
Training with firearms is an inherently dangerous activity. Be sure to follow all safety protocols when using firearms or practicing these drills. These drills are provided for information purposes only. Use at your own risk.
Robust Dry Practice Safety Principles and Procedure (the closer you follow this, the fewer opportunities you will have to ND)
Principles:
Allow no distractions focus exclusively on the task at hand
Keep muzzle in a safe direction
Use correct trigger finger discipline
Verify no live ammo in gun, on person, or in the dry practice area
Use dedicated dry practice targets that are put away until you consciously choose to begin dry practice, and taken down when you consciously end dry practice
Use dedicated dry practice magazines and dummy rounds/inert training cartridges that stay in the dry practice area (if you use any magazine or cartridges)
Procedure:
Unload gun in a location other than the dry practice area
Leave live ammo, and magazines with live ammo, completely outside the dry practice area
Enter the dry practice area
Verify gun is unloaded, that any magazines do not contain live ammo, and that any cartridges present are inert/dummy cartridges
Consciously choose to begin dry practice
Put up dry practice targets
Do your dry practice
Take down dry practice targets and put them away
Consciously choose to end dry practice
Exit the dry practice area and do something unrelated for a few minutes
Return gun to location and condition of your choosing
-
Member

Monday, April 27
30 minutes dry fire (DOW 109 was one of five drills)
Gun/gear: Glock 17 gen4, Safariland 578 GLS open-top holster with1.5" drop UBL on nylon duty belt
Target(s): 3.5" post-it notes at ~6 yards
Not sue how many reps. Worked this one for about ten minutes. About half moving right-to-left and half moving left-to-right.
Notes: Tension is bobble inducing and slow. As the time gets tighter, I want to move faster by pre-tensing my arms and shoulders. This DOES NOT WORK. I'll miss the grip on the draw more frequently, and even when I don't, it's harder to hit the par times. When I relax, I hit my grip on the draw more consistently, the sights settle more quickly, and I'm faster. It feels like I'm moving slower, but the timer says otherwise. Learn to relax!
-
Leopard Printer
This is another of my mainstay dry fire drills. It's incorporated at least a little into most dry practice sessions with varying scaled silhouette targets (scaled 10, 20, 30+ yard targets, some partials, lower and upper A-zones, etc.) Have probably done an hour or more of this one over the last couple of weeks.
Last night I did something I haven't done in some time - dry fired the Rogers Test. Did it twice on my scaled static Rogers Range. Gen3 G34 as usual.
Good technical transitions = snap the eyes, keep the upper body structure intact and bring the gun to the new spot, stop the gun and press.
[img]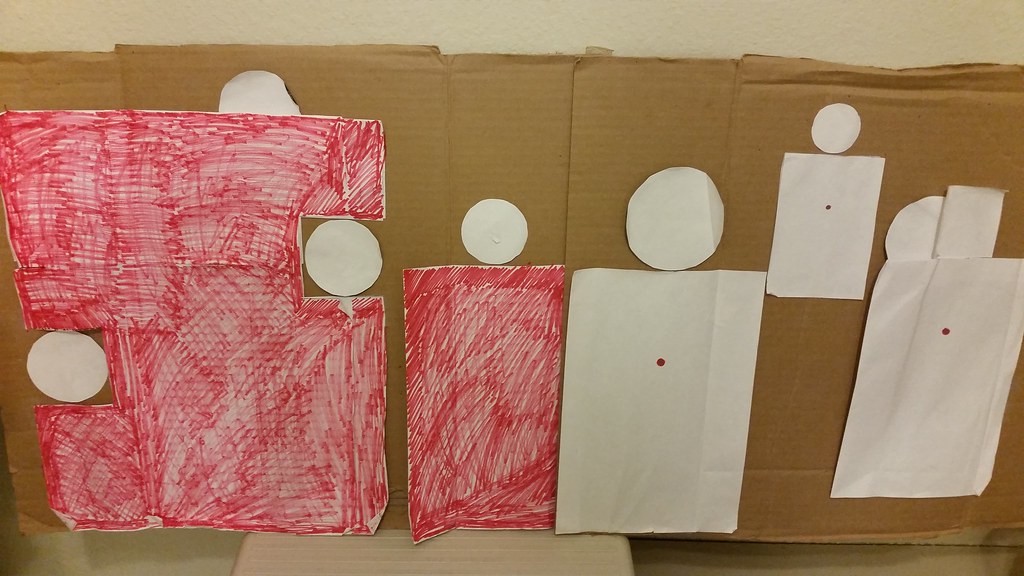 20150429_061818 by OrigamiAK, on Flickr[/img]
-
Site Supporter

-
Worked this drill for about 20 minutes this morning. Tried out the snap-the-eyes thing that Mr. White mentioned. Lightbulb moment. Need to try this live-fire -- maybe it'll get me to stop overshooting transitions to an index card (shots land above it, still in the head).
Targets used were an index card and a post-it note with a dot drawn in the middle (~1"), distance was about 12ft.
I need to work on riding the reset less. The tendency for me is to get my sight where it wants to be and then reset the trigger (sight->click->bang). Some improvement when I really drilled myself down on doing that, but if I'm not paying attention it's what I end up doing.
-
~15 minutes
Glock 17 w/ Trijicon HDs
1/2 Index cards for targets @ 7Y
-
15 minutes of work on this one. Beretta 92 for gun.
I decided to spend part of my first session of work on 50 yard scaled targets on this drill. So the targets were two 50 yard USPSA metric targets spaced a scaled 2 yards apart. I used a timer. The way I did this was with gradually reducing times. If I was successful 5 times in a row at a given PAR, I reduced it by 0.1 Sec. First PAR was 2.0 Sec, which was way too slow, as I was able to do the transition and shot with loads of time to spare. I got it down to 0.9 Sec before my forearm fatigue forced me to move on to another drill.
-
Have included this drill occassionally during regular dry fire and will try to incorporate it on a more regular basis. Did this for 15 minutes today using gen 4 Glock 23 with Trigicon HD sights on USPSA targets at 5, 7 and 10 yards spaced 3 feet apart. Was easy to over shoot second target especially transitioning to strong side target. Once again concentration is key. Scaled targets don't work real well for me as I have found small but close targets will still be in focus but full size targets at distance completely blur away when trying to get front sight in focus. Seriously considering a MRDS.
-
Site Supporter

Thursday 04/30/2015
30 Minutes
Glock 22/G4 w/TLR-1 and SIRT*
Targets: 8" paper plate @ 7yds and a 3"x3" post-it note @ 5yds.
I started the transitions alternating from big to small then from small to big but I did not change the range difference. I began feeling robotic and was getting a weird hesitation right before resetting the trigger after the transition. I think I was thinking about it too much. I took about a 2 minute break, resumed and felt a little smoother. Wife got upset about the "gun clicking noises" (I'm admittedly whooped) so I transitioned to my SIRT. I used the both lasers and it was actually a good thing because the second laser was giving me a decent visual clue as to when I was coming off the trigger to reset. I ended up using the SIRT for about 20 of the 30 minutes and although it doesn't have as distinct of a reset of the Glock it does have a tactile-reset point. I think next time I use my timer (when wife is not home!) to get a bit of base to judge future performance with this drill.
-
Site Supporter

I've been working on this since it was posted. A few days ago I printed a few more targets to help work this drill a little harder. I need to print a few more targets and place at different heights. I'll continue to work on this over the next few weeks and post my thoughts before the thread closes.
 Posting Permissions
- You may not post new threads
- You may not post replies
- You may not post attachments
- You may not edit your posts
-
Forum Rules


 Good shit!